Connect Webflow to SEOryon
Paste a Webflow API token, pick the Collection your blog lives in, and SEOryon maps the fields for you. Articles arrive as Collection items, staged and then promoted live, wearing your existing template.
- How it connects
- Webflow API token, then pick your CMS Collection
- Edit after publishing
- Yes, updates republish the same post
- Delete and unpublish
- Yes, from SEOryon
- Tables
- No. SEOryon publishes a structured bullet list instead.
Before you connect
Get these in place first. They are the difference between a connection that goes green and one that fails on the first publish.
Do not skip this one
Sitemap indexing turned on in Webflow. Webflow is the one platform where new posts are not indexed by default, so SEOryon holds the connection at Setup incomplete, enable sitemap indexing until you confirm it.
- A CMS Collection for your blog with at least Name, Slug, and Post Body fields. SEOryon maps title, slug, and body to those automatically and validates them against the live Collection.
- A Webflow API token with CMS read and write, Sites read-only, and (recommended) Assets read and write.
How to connect, step by step
The same steps SEOryon walks you through in the app, with the screens you will actually see.
- 1
In the Webflow Designer, click the W menu at the top left, then Site settings.
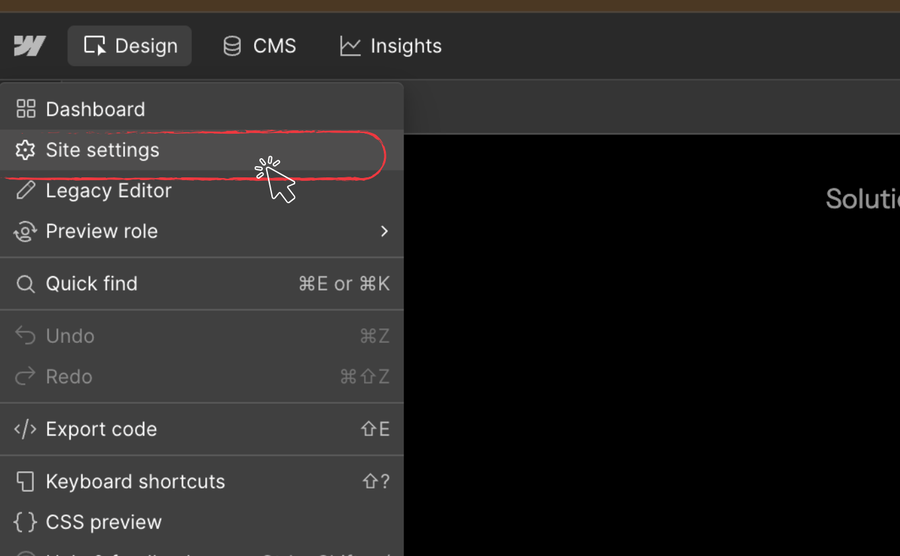
Webflow Designer: W menu, Site settings. - 2
In the left sidebar, open Apps & Integrations.
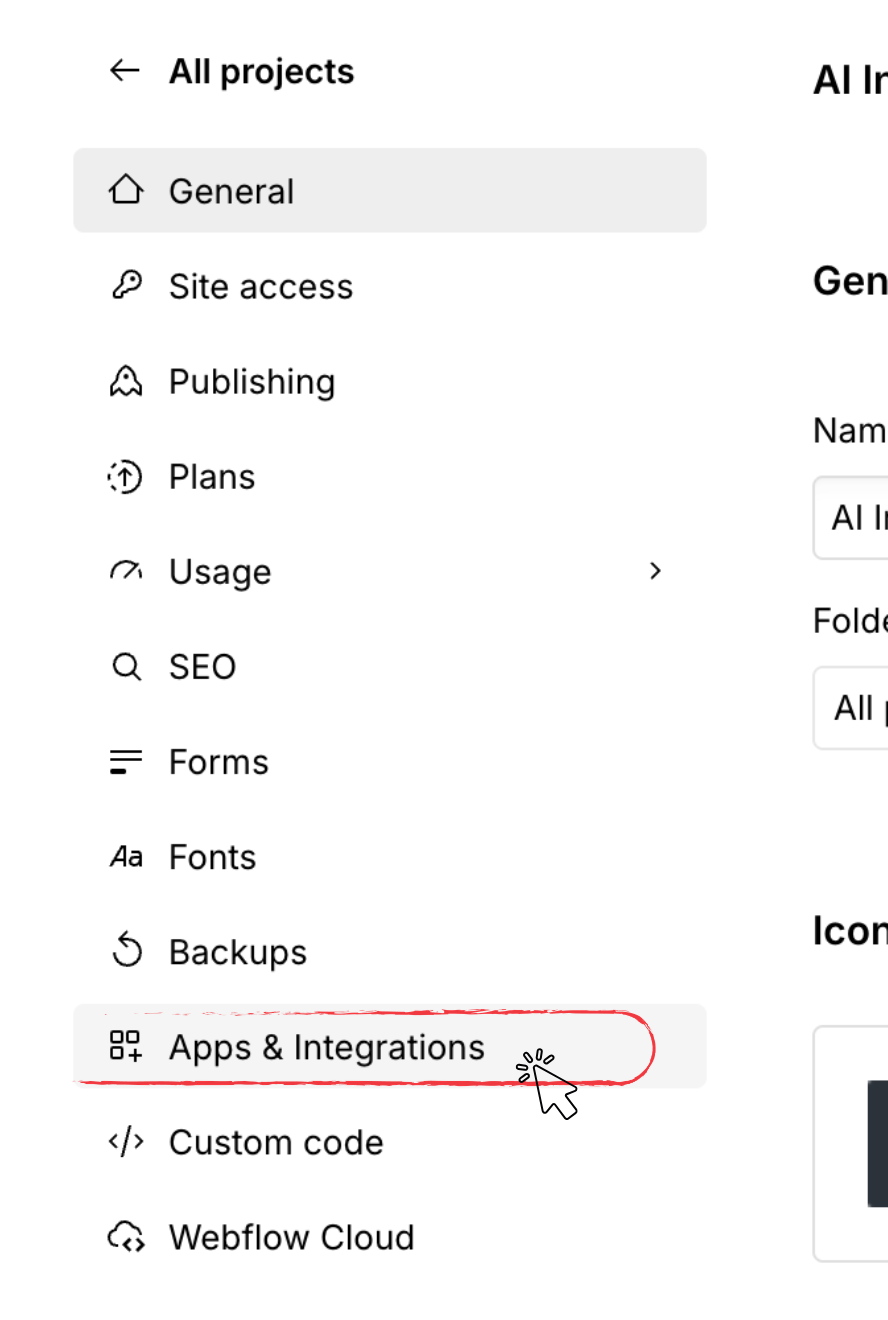
Site settings sidebar: Apps & Integrations. - 3
Scroll to API access and click Generate API token.

API access: Generate API token. - 4
Set Assets to Read and write. Optional but recommended: it uploads hero images into Webflow. Without it images still publish, hotlinked from SEOryon.
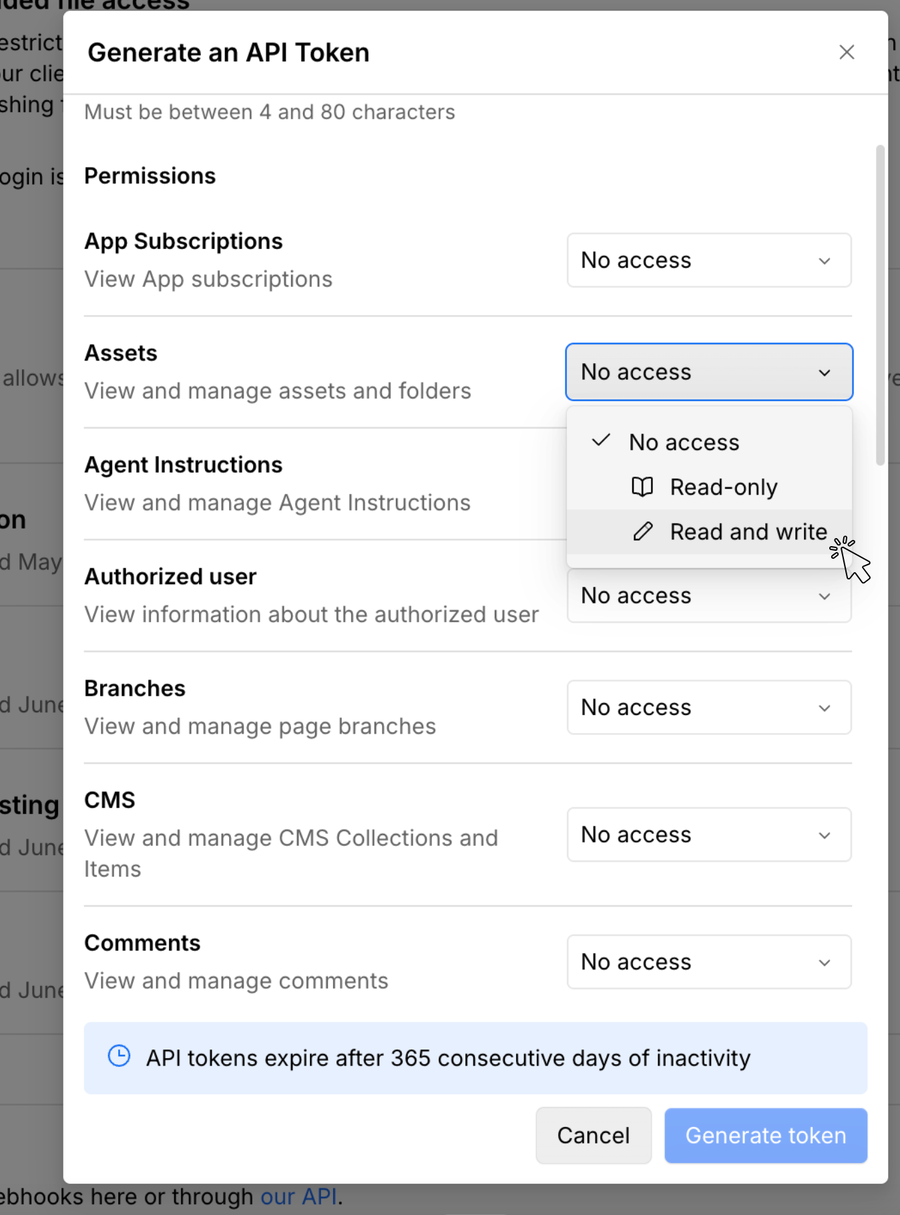
Permissions: Assets, Read and write. - 5
Set CMS to Read and write. Required, so SEOryon can create, publish, and delete posts.
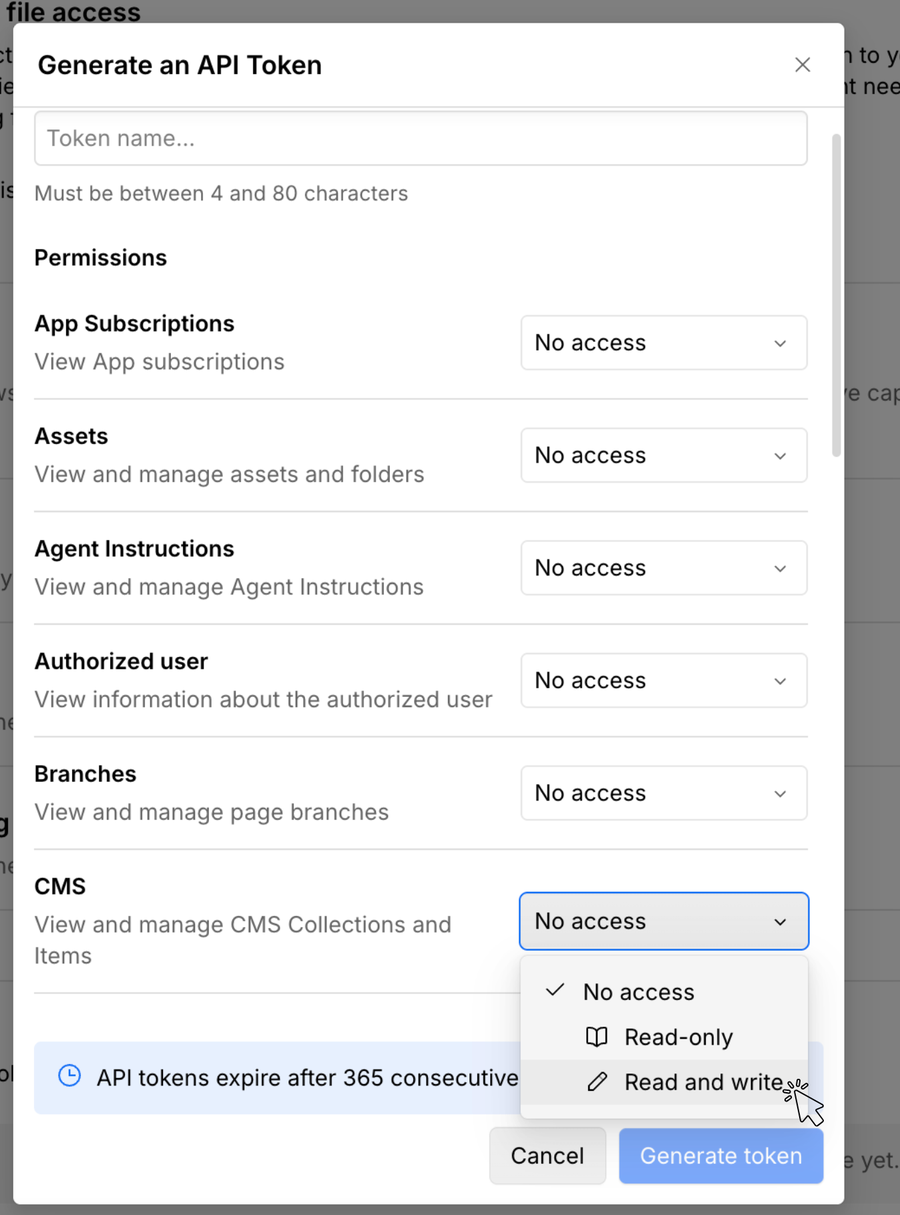
Permissions: CMS, Read and write. - 6
Set Sites to Read-only. Required, so SEOryon can list your sites.
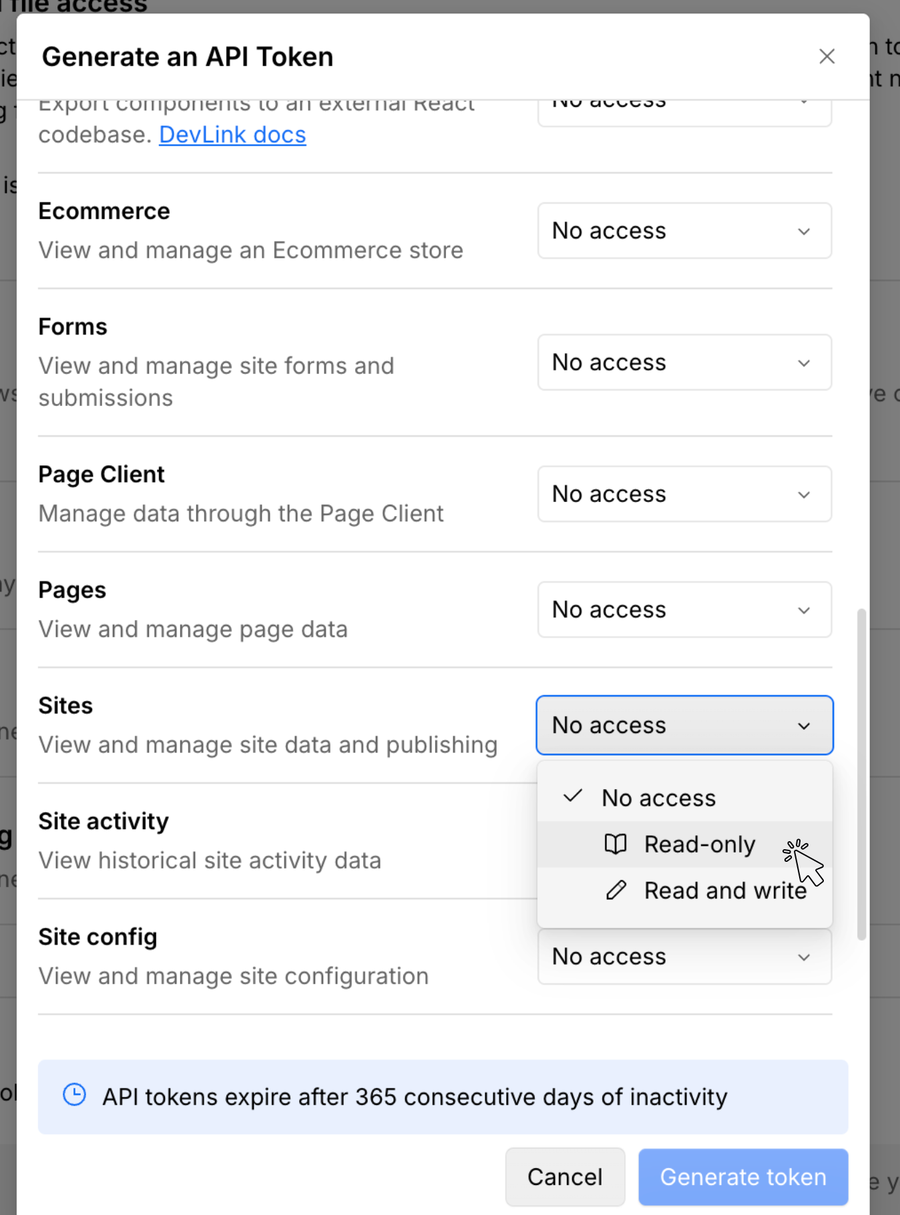
Permissions: Sites, Read-only. - 7
Copy the token (Webflow shows it once) and paste it into SEOryon, then choose the Collection to publish into. SEOryon stores the token encrypted and never displays it again.
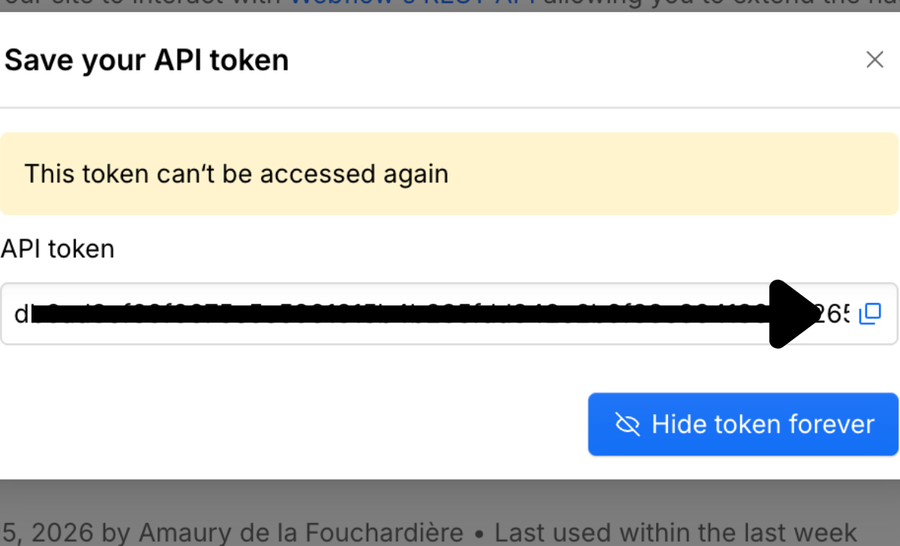
Copy the token, then paste it into SEOryon. - 8
Now turn indexing on, or your posts stay invisible. In Site settings, SEO, Sitemap, enable Auto-generate sitemap. Webflow requires a Site plan for this.

Site settings, SEO: auto-generate sitemap. - 9
Back in the Designer, open the Pages panel.
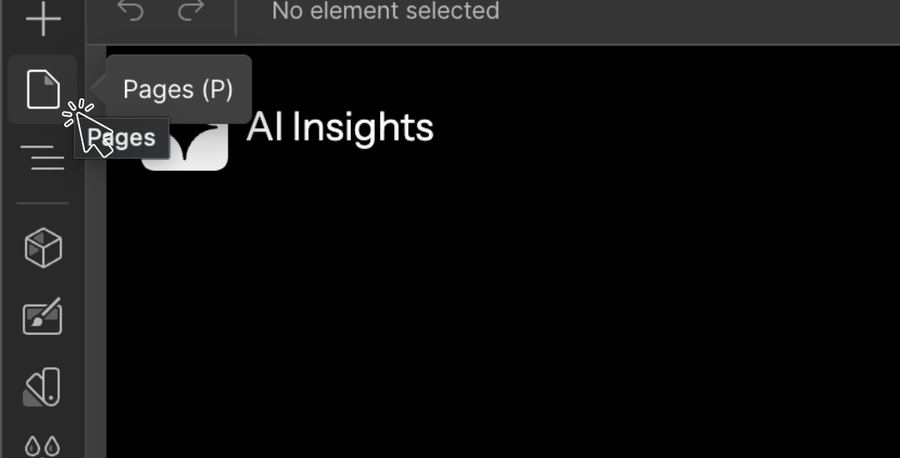
Webflow Designer: the Pages panel. - 10
Hover your blog page and your Blog Posts Template, then click the gear to edit page settings.
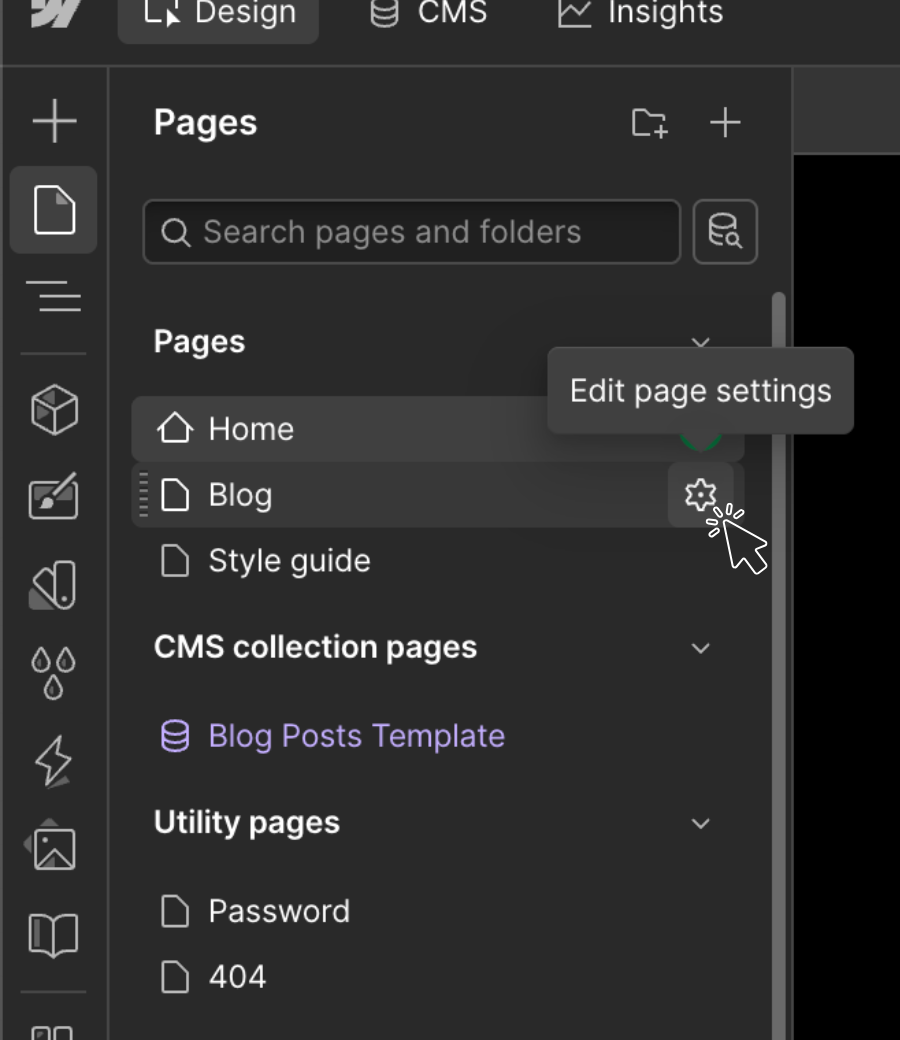
Pages panel: Edit page settings. - 11
Switch Sitemap indexing on. Left off, that template never appears in search results or in your sitemap.
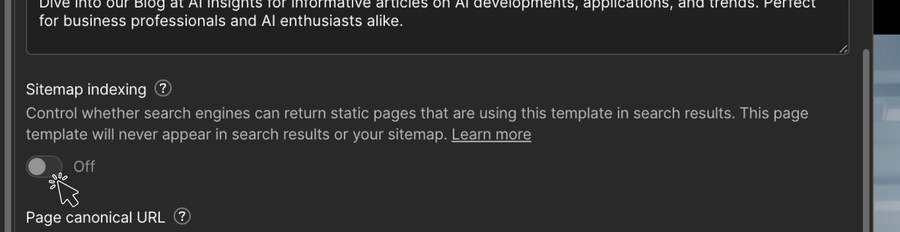
Page settings: turn Sitemap indexing on.
What happens when you click Connect
Connecting runs a real test publish. SEOryon creates a draft, verifies it, deletes it, and only then marks the connection healthy, so a connected badge means publishing genuinely works.
What you can do once Webflow is connected
- Create the item staged, then promote it live.
- Update in place, so an edit in SEOryon republishes the same Collection item.
- Delete and unpublish remotely from SEOryon.
- Featured image, uploaded into Webflow when the token has Assets access.
- Automatic field mapping (Name, Slug, Post Body), validated against your live Collection before anything publishes.
What to know about Webflow
The honest part. Every platform has edges, and you should hear about them from us before you hit them.
Tables do not work on Webflow. Webflow's Rich Text field cannot import HTML tables, and a real table published there came out as run-together text. SEOryon detects Webflow and publishes a structured bullet list instead, so the comparison still reads.
Webflow is the only platform where posts are not indexed by default. Turn on sitemap indexing (steps 8 to 11 above) or your articles never reach the sitemap.
Comparison tables do not publish as tables on Webflow, so SEOryon sends a structured bullet list instead. See the full table support matrix.
What publishing looks like
Each approved article becomes a Webflow Collection item, styled by your existing template, published live with its image and internal links in place.
SEO on Webflow
Best practices that move the needle
Clean code and fast hosting give you a head start. Spend the time on structure and content.
- Set per-page title and description fields, and wire them into your CMS collections.
- Use proper heading levels in the designer rather than styling text to look like headings.
- Generate a sitemap and connect search console so new pages get found quickly.
- Add alt text on every CMS image field, not just the static ones.
- Keep one H1 per template and let collection items fill the rest of the structure.
 GoHighLevel
 Base44
 Lovable
See it on your own site, free.
Start a 3-day free trial and generate 3 real articles on your own site before you decide. Cancel before day 3 and you pay nothing.
- Done-for-you articles, monthly
- Built on your real search data
- Publishes straight to your CMS
- Built for Google and AI search
- 3-day free trial, cancel anytime